Dry spots kill tomatoes. Soggy roots rot your peppers. If you’re tired of hauling hoses or watching sprinklers waste water on sidewalks, drip irrigation fixes that fast.
This system trickles water straight to plant roots. It keeps soil moisture consistent without evaporation or runoff. You save up to 50% on water bills, grow healthier plants, and spend less time watering.
In this guide, we cover why drip works so well. Then pick kits, gather supplies, map your setup, connect it all, test emitters, and maintain for years. Perfect for veggie patches, flower beds, or lawns. Let’s get your garden thriving.
Why Drip Irrigation Delivers the Steady Moisture Your Plants Crave
Drip systems shine because they release water slowly through thin tubes and emitters. Water soaks in at the roots. Leaves stay dry, so diseases drop.
Sprinklers lose half their water to wind and sun. Hoses flood one spot then dry another. Drip avoids that mess. It uses 30 to 50% less water overall.
Plants get steady sips. Roots grow deeper for better drought resistance. No wilting on hot days. Soil stays even moist, so veggies like tomatoes swell without cracking.
Weeds struggle too. Surface soil dries out. They sprout less, saving you pulling time.
Think of a tomato row. Emitters space every foot. Fruit stays plump. No blossom end rot from uneven wet-dry cycles.
Beginners love drip. No complex timers needed at first. Just turn on the faucet. Results show quick.
For slopes, water flows down without pooling. Flat beds get equal coverage. Everyone wins.
Real gardeners report bigger harvests. Peppers yield more. Flowers bloom longer. Water bills shrink.
Drip mimics nature’s rain. Gentle and targeted. Your plants drink what they need.
Choose the Best Drip Irrigation Kit for Your Garden Size and Needs
Start with your space. Small gardens under 200 square feet suit starter kits for raised beds. They include 50 feet of tubing and 10 emitters.
Medium plots from 200 to 500 square feet need soaker hoses. These seep water along the length for row crops like carrots.
Large areas over 500 square feet call for modular systems. Add lines for trees or lawns. Pots work with button drippers.
Match plants to flow. Veggies like squash need 1-2 gallons per hour emitters. Flowers or herbs take half that. Drought-tough shrubs use even less.
Check water pressure. Most homes run 20 to 60 PSI. Kits handle it fine. Low pressure? Pick adjustable regulators.
Budget picks under $50 cover basics for a 10 by 10 bed. Spend $100 for pro kits with timers from Rain Bird or Orbit.
| Garden Size | Kit Type | Tubing Length | Emitters Needed | Price Range |
|---|---|---|---|---|
| Small (<200 sq ft) | Starter | 50-100 ft | 10-20 | $30-50 |
| Medium (200-500 sq ft) | Soaker Hose | 100-200 ft | 20-50 | $50-100 |
| Large (>500 sq ft) | Modular | 200+ ft | 50+ | $100-200 |
This chart helps size right. Uneven flow happens with mismatches. Plants suffer.
Test your faucet pressure first. Kits often include gauges. Pick based on veggies or flowers.
Brands like Rain Bird offer reliable parts. Orbit kits expand easy. Read reviews for your climate.
Right kit means even moisture. No guesswork.
Gather These Essential Supplies Before You Start
Stock up smart. Main tubing, half-inch poly, forms the backbone. Get 100 feet for small plots.
Emitters control flow. Choose 1-2 GPH for most plants. Pressure-regulated ones handle hills.
Connectors join lines. Tees split to rows. Elbows turn corners. End caps seal tips.
Filter traps dirt. It sits at the faucet. Clogs ruin systems.
Regulator drops pressure to safe levels. Timers automate runs.
Stakes or clips hold lines down. Hole punch makes emitter spots. Scissors cut tubing clean.
Mulch optional. It locks in moisture after setup.
Quantities vary. Small garden: 100 ft tubing, 20 emitters, one each of filter, regulator.
Buy at garden centers or online. Total cost $30 to $150.
Wear gloves. Tubing cuts sharp.
Map Out Your Layout for Even Coverage
Plan zones by thirst. Cluster high-water veggies like tomatoes near the faucet.
Sketch on graph paper. Run main line along rows. Branch to plants.
Space emitters 12 to 18 inches for veggies. Use 24 inches for shrubs.
Slopes need emitters uphill first. Gravity pulls water even.
Mark trees separate. Drip rings circle trunks.
This layout ensures no dry corners.
Connect to Your Water Source Securely
Attach regulator to faucet. Screw filter next.
Run main line to garden. Bury shallow or weight with rocks.
Punch holes for branches. Insert tees or elbows.
Clamp all fittings tight. No leaks later.
Test connection with short run.
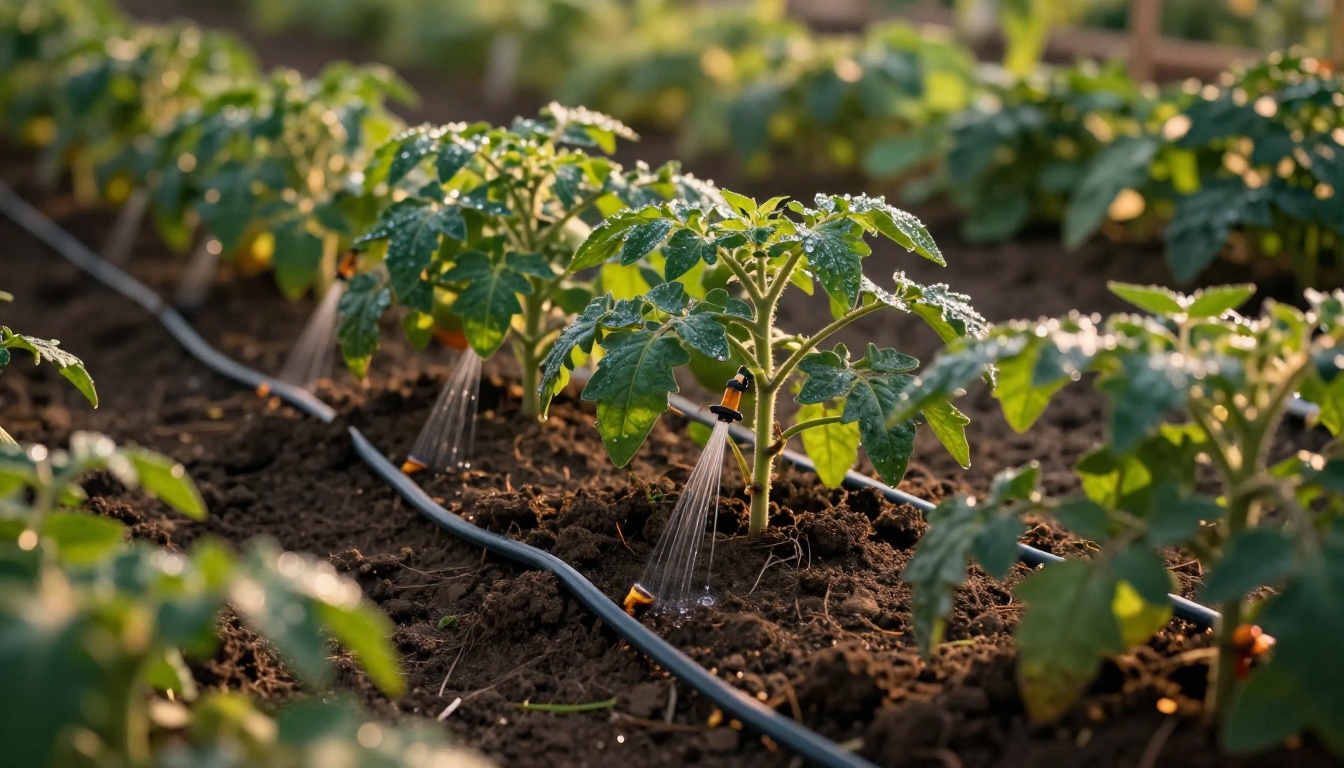
Place Emitters and Test the Flow
Lay drip lines along roots. Punch holes.
Push emitters in firm. Space per plan.
Cap ends. Stake lines.
Run water 30 minutes. Watch for leaks or dry spots.
Adjust spacing if needed. Plants get perfect moisture now.
Maintain Your System for Year-Round Reliable Moisture
Check weekly. Flush lines to clear clogs. Run vinegar through emitters yearly.
Winter prep matters. Drain lines. Store indoors.
Summer adds emitters for thirsty plants.
Use finger test for soil. One inch dry? Water more.
Meters confirm moisture levels.
Add fertilizer injectors for nutrients via water.
Longevity comes from care. Systems last 5 to 10 years.
Store off-season coiled loose.
Troubleshoot low pressure. Clean filter first.
Spot and Fix Common Problems Fast
Leaks show at fittings. Tighten or replace.
Uneven flow? Clean emitters with picks.
Roots block lines. Add screens at punch holes.
Low output means clogged filter. Rinse it.
Rarely call pros. Most fixes take minutes.
Your system stays reliable.
Drip irrigation keeps soil moisture steady year-round. You save water and time. Plants thrive with roots fed just right.
Start small. One bed proves it works. Expand next season.
Share your setup photos in comments. What grew best? Subscribe for more garden tips.
Enjoy bigger harvests and lower bills. Your garden thanks you.