Ever felt a sneaky chill in your greenhouse on a mild day? Those drafts don’t just make you shiver; they zap heat and stress your plants. One winter, my tomatoes wilted overnight because air leaks turned my cozy setup into a wind tunnel.
Building science shows poor seals let up to 30 percent of your heat escape. That’s money down the drain on heaters and lost crops. You work hard to grow fresh veggies or flowers, so why let leaks steal your success?
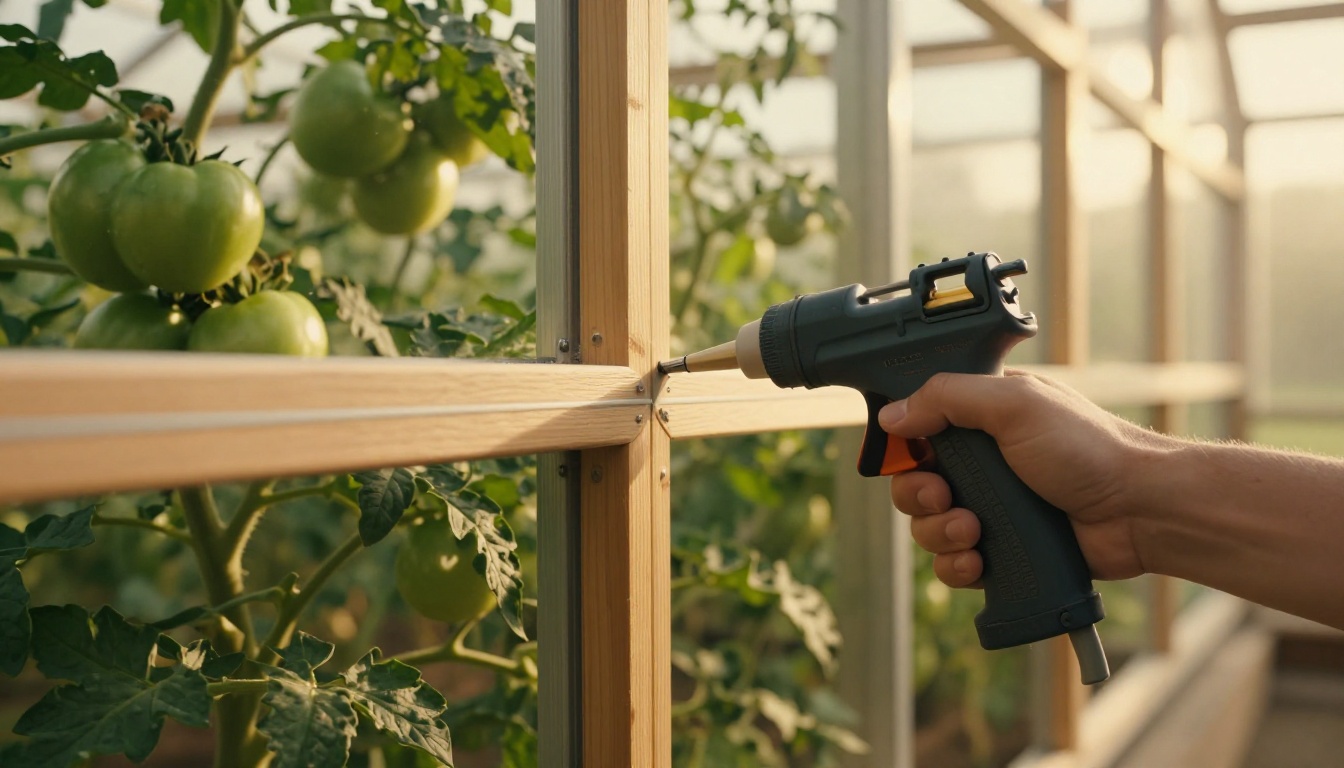
I fixed my old wood-frame greenhouse last year. Caulked the gaps, added weatherstripping, and watched my peppers thrive through frost. Bills dropped, plants exploded with growth, and the frame looks solid.
You’ll get the same wins: stable temps for bigger yields, lower energy costs, and frames that last years longer. This guide shows you how to seal air leaks in greenhouse frames, from aluminum to wood.
First, we’ll spot those hidden leaks with simple tests. Then grab the right tools and follow step-by-step fixes. Stick around for pro tips that make it last. Ready to button up your greenhouse?
Hunt Down Hidden Air Leaks Before They Steal Your Heat
Pick a windy day to inspect your greenhouse frame. Cold air rushes in through tiny gaps, and warm air slips out. That exchange hikes your heating bills fast. For example, a 1/8-inch gap leaks as much heat as a 3-inch open window. So grab tape to mark spots, and use safe ladder steps with a spotter below.
Start with simple tests. Hold a wet finger near joints; you’ll feel chill on one side. Or light incense and watch smoke curl into leaks. These tricks reveal hidden drafts without fancy gear. Visual checks help too: scan for cracks, warped edges, or loose fittings. Mark every suspect area with bright tape. Now you know where to focus.
Key Spots to Check on Aluminum Frames
Aluminum frames shine for greenhouses, but they contract in cold weather. This pulls joints apart and opens gaps. Panels shift, and screws loosen over time. Check these prime leak points first.
- Track gaps where panels slide: Dust builds up here; drafts whistle through.
- Screw and rivet holes: Gaps form around fasteners as metal shrinks.
- Roof-to-wall joints: Corners separate most in winter chills.
- Door and vent edges: Seals wear thin from constant use.
Run your smoke test along tracks and edges. Note gap widths in inches for sealant choices later. You’ll seal them tight soon.
Wood Frame Trouble Areas You Cannot Ignore
Wood frames charm with their look, yet humidity swings make them tricky. Boards swell in wet seasons and shrink in dry ones. This creates cracks that worsen yearly. Nails pop out, and fits loosen.
Target these weak spots before leaks grow:
- Shrinkage cracks between boards: Dry air widens them overnight.
- Around nails and screws: Wood pulls away, leaving air paths.
- Base-to-floor gaps: Settling soil opens bottom edges.
- Window and door fits: Warped frames let wind sneak past.
Feel drafts with your hand on windy days. Wood needs flexible fixes like backer rod and caulk. You’ll preview those next; they flex with seasonal changes and block cold for good.
Stock Up on Simple Tools and Sealants That Actually Work
You found the leaks. Now gather supplies that match your frame type. Wrong choices crack or peel fast in greenhouse humidity. Hardware stores stock budget picks under $50 total. So pick durable options built for weather swings.
Start with sealants because they block air best. Silicone caulk suits aluminum frames. It stays flexible and repels water. Latex or acrylic caulk works for wood. You paint it later, and it shrinks less than others. Avoid oil-based caulk on wood; it traps moisture and rots boards.
Fill deep gaps first with foam backer rods. They support caulk and prevent cracks. Cut them to fit, then top with sealant.
Grab these basics next. They make the job clean and safe:
- Caulk gun: Holds tubes steady for even beads.
- Weatherstripping tape: Seals doors and vents quick.
- Utility knife: Trims excess sealant sharp.
- Painter’s tape: Masks edges for neat lines.
- Rags and mild cleaner: Wipe messes before they dry.
- Gloves: Protect hands from sticky fumes.
Ventilate well during use. Fumes irritate eyes and lungs. Open doors and vents first.
| Frame Type | Best Sealant | Why It Works | Avoid |
|---|---|---|---|
| Aluminum | Silicone | Flexible, waterproof; handles metal shifts | Latex (too rigid) |
| Wood | Latex/Acrylic | Paintable, low shrinkage; flexes with boards | Oil-based (rots wood) |
These picks last seasons. Stock extra tubes. You’ll save time and redo work less.
Seal Aluminum Frames Tight: Your Easy 5-Step Plan
Aluminum frames handle greenhouse weather well, but they shift with temperature changes. Gaps open up fast, so you need a tight seal. Follow this simple 5-step plan with silicone caulk. It blocks drafts, cuts heat loss by 20 to 30 percent, and saves on bills. Your plants stay warm; yields go up. Best part? You finish in a weekend.
Here are the steps in order:
- Clean surfaces spotless.
- Pack big gaps with backer rod.
- Tape edges and apply caulk.
- Smooth the bead.
- Cure fully and test.
Work above 50 degrees Fahrenheit. Use thin beads for flex. Too much caulk cracks later. Now let’s break it down.
Prep Tricks for Clean Aluminum Surfaces
Start right, or your seal fails quick. Dirt, old sealant, and grease ruin adhesion. First, scrape off all old stuff. Use a plastic putty knife; it won’t scratch metal. Dig into joints fully. No remnants left.
Next, wash with soapy water. Mix dish soap and warm water. Scrub tracks and edges with a brush. Rinse well. Dry completely with rags. Water traps weaken bonds.
Wipe with rubbing alcohol last. It cuts grease and oils. Surfaces shine clean. Test by running your finger; it glides smooth. This prep takes 30 minutes per frame section. Skip it, and caulk peels in months.
Picture this: before prep, your frame looks grimy with flakes. After, it gleams ready. Strong bonds mean your seal lasts years. Energy stays in; no more wasted heat.
Pro Application Moves for Lasting Seals
Grab your caulk gun now. Cut the tip at a 45-degree angle. Makes a fine bead. Hold steady for continuous lines. No gaps or blobs.
For deep spots over 1/4 inch, push in foam backer rod first. Twist it snug. It supports caulk and saves material.
Mask edges with painter’s tape. Press firm. Apply silicone in one smooth pass. Fill joints even. Work top to bottom so drips don’t mess lower areas.
Smooth right away. Dip a finger in soapy water or use a tool. Wipe along the bead. Creates a perfect concave shape. Pull tape off quick at a 45-degree angle. Mess-free lines every time.
Let it cure 24 hours. Keep doors shut. No rain or frost. Then pressure test. Run a fan inside. Feel outside for leaks with your hand or smoke. Fix spots fast.
Common slip? Thick globs crack when metal moves. Thin beads flex better. After sealing, my greenhouse held heat overnight. Bills dropped 25 percent. Yours will too. Tight frames mean happy plants and full wallets.
Fix Wood Frames Without Cracks Coming Back Soon
Wood frames bring warmth to your greenhouse, but they expand and shrink with every rain and dry spell. Seals crack fast unless you pick flexible products and prep smart. Last season, I sealed my wood setup this way. No gaps reopened, plants stayed cozy, and the look stayed fresh. You’ll follow a 5-step plan tailored for wood: sand light, fill deep gaps, prime bare spots, caulk smooth, then paint over. Pick dry days above 50 degrees Fahrenheit. Flexible latex caulk handles movement best. Skip primer, and rot sets in quick. Here’s how to make it stick for years.
Handle Wood’s Shrink-Swell with Smart Prep
Wood pulls in moisture from humid greenhouse air. It swells, then shrinks in dry winters. Gaps reopen around seals. First, check wood moisture with a cheap meter from hardware stores. Aim under 15 percent before you start. Dry it out if higher; fans speed the job.
Sand rough spots lightly next. Use 220-grit paper. Wipe dust away. This creates a smooth base for filler and caulk. Don’t over-sand; you remove too much wood.
For deep gaps over 1/4 inch, pack in backer rod or exterior wood filler. Twist backer rod snug; it flexes with boards. Wood filler hardens firm for seasonal shifts. Cut pieces to fit tight. Press firm. Let it cure per label.
Prime all bare wood after. Brush on exterior primer. It blocks moisture and helps paint grip. Coat joints and fills twice. Dry fully between coats. This step prevents rot because wet wood under seals traps water. Your frame stays strong. In short, smart prep stops cracks from returning.
Smooth Finish Tips for Painted Wood Looks
Apply paintable latex caulk now. Cut the tube tip small for thin beads. They flex as wood moves. Fill joints even from top down. Avoid thick globs; they crack first.
Tool the bead smooth right away. Dip a sponge in soapy water. Wipe along the line. Creates a neat concave shape that sheds water. Or use a plastic spoon edge. Pull slow and steady. This seals air tight without mess.
Mask edges with painter’s tape first. It keeps lines crisp. Peel tape off quick at 45 degrees before caulk skins over.
Sand lightly if needed before paint. 320-grit smooths bumps. Wipe clean.
Paint over after 24-hour cure. Use exterior latex paint. Two coats match your frame color. Brush thin. It protects caulk from sun and locks out drafts. Test seals with smoke or hand after. Feel no air? You’re done.
I painted mine sage green. It blended perfect, and no cracks showed up next winter. Plants grew lush because heat stayed in. Yours will look pro and perform better.
Test Seals and Maintain for Year-Round Wins
You sealed those gaps. Now prove they work. A quick test catches weak spots before cold snaps hit. Plus, regular upkeep keeps your greenhouse tight all year. I check mine after every fix, and it pays off with steady temps and fat harvests. Let’s verify your seals first, then set up easy maintenance.
Run These Simple Tests After the Cure
Wait 24 to 48 hours for full cure. Then test on a breezy day. Smoke works best; light incense near joints. Watch trails pull into leaks. No smoke? Seals hold strong.
Candle flames help too. Hold steady outside; flickers show air pulls. Or use your hand for chill spots. Got a thermal camera? It spots cold streaks fast on warm surfaces. Apps pair with cheap ones under $50.
Pressure up inside with a fan. Feel outside for escapes. Mark failures and spot-fix with fresh caulk. These checks take 30 minutes. They confirm you saved 20 to 40 percent on bills long-term.
Build a Maintenance Routine That Sticks
Check seals every three months. Walk the frame on windy days. Feel for drafts; tug weatherstripping. Refresh tape or foam strips yearly because sun fades them.
Reseal cracks annually in dry weather. Scrape old bits first. Reapply thin beads. It prevents small issues from growing.
Bonus step: add bubble wrap insulation in winter. Tape it to panels inside. Traps heat without light loss. Plants love the extra cozy.
Peeling seals? Wrong product caused it. Switch to silicone for aluminum or latex for wood. Clean better next time. In short, consistent care means your frame fights leaks forever. Plants thrive; you save cash.
Conclusion
You now know how to seal air leaks in aluminum and wood greenhouse frames. First, hunt leaks with smoke or your hand on windy days. Then stock silicone for aluminum or latex for wood, plus backer rods and tape. Follow the 5-step plans: prep clean, fill gaps, apply smooth, cure, and test. Finally, check seals often to keep heat in year-round.
These fixes turned my drafty greenhouse into a plant paradise. Peppers grew strong through frost because temps stayed steady. Bills dropped, and frames held up. You get the same results: bigger yields, lower costs, and happy plants.
Grab your tools this weekend and seal those gaps. Share your before-and-after in the comments below. For more wins, check our post on best greenhouse thermostats. What leaks did you find first?
Your greenhouse thrives now. Plants thank you with fresh growth all season.